Happy hump day, my friends! Only two more days ’til the weekend. Well, three if you count today!
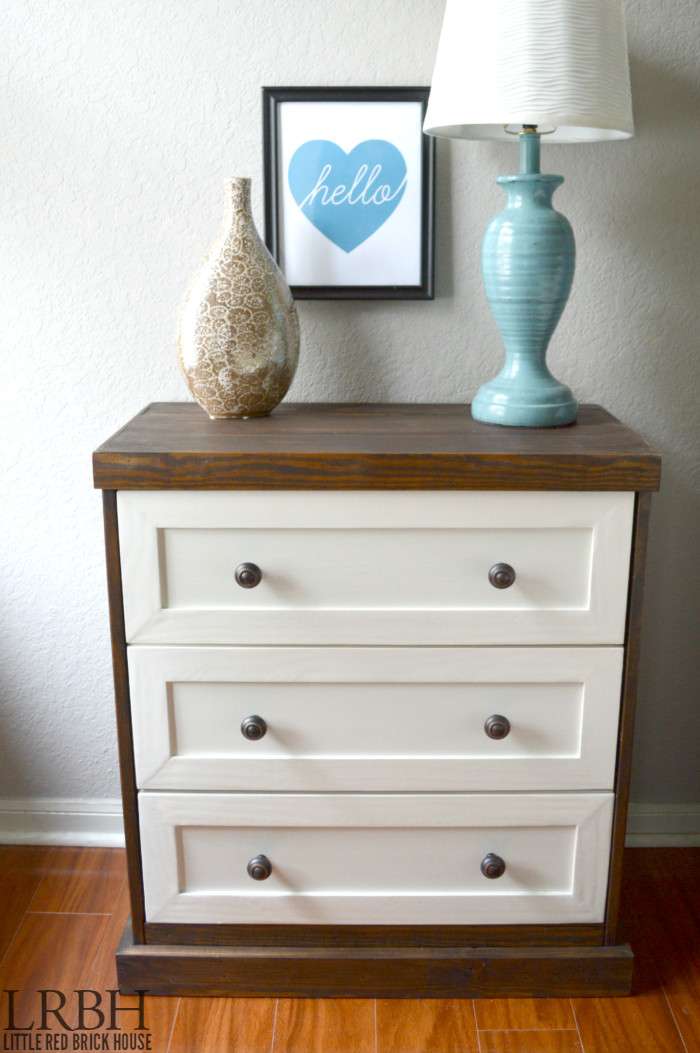
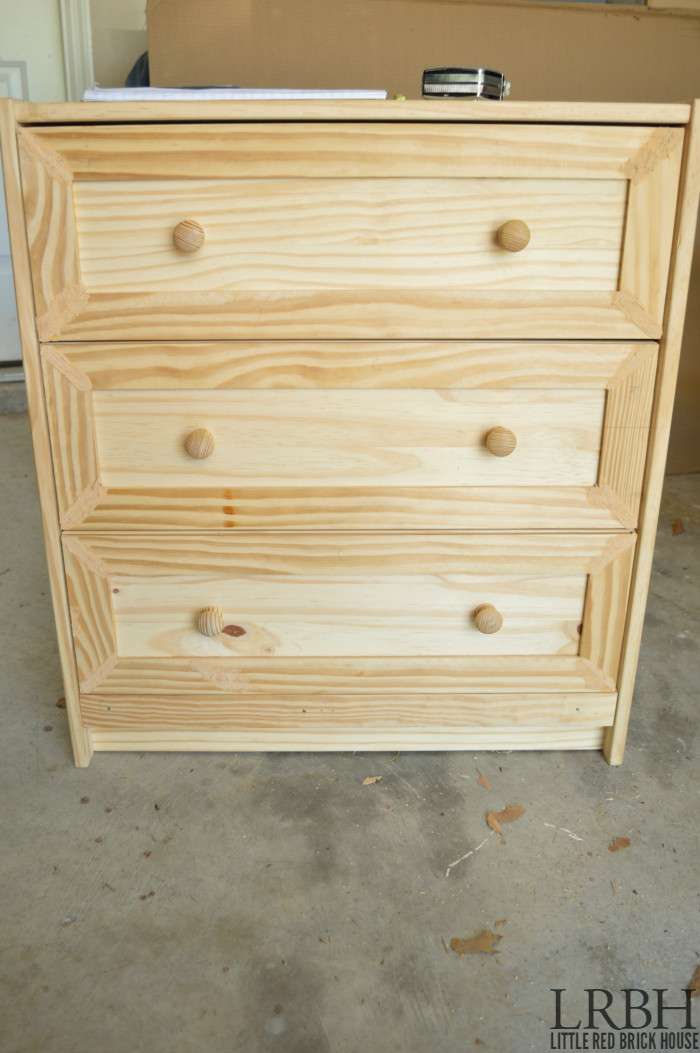
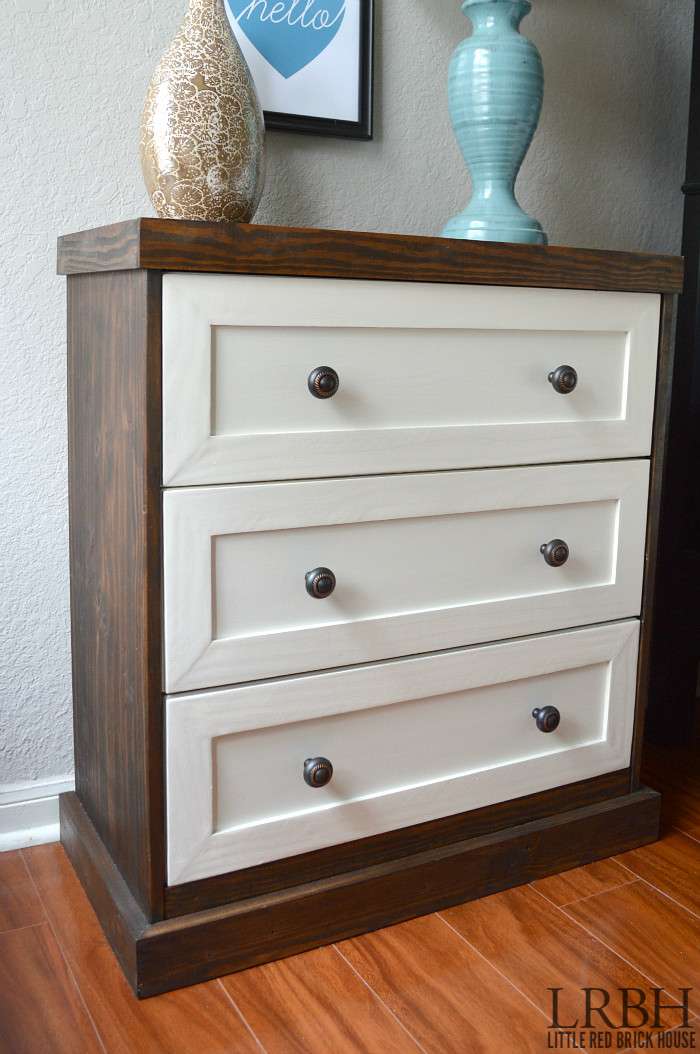
We’re taking things to another room of the house (finally)- the bedroom! One of the first problems I needed to tackle in here was storage. For the longest time I was using a cardboard box that was filled with old books that I never got around to unpacking after the move. Enter my two toned IKEA Rast dresser hack! I have seen so many hacks all of over the web and I knew I had to customize one of my own. I love that it’s made from real wood and how it provides tons of storage. You really can do just about anything to these dressers, and at $40 they are extremely affordable.
First, I added some dimension to the drawers by trimming them out with some wood lattice strips. I mitered my corners for a cleaner fit but you don’t have to. I filled in any seams with wood filler and sanded everything to a smooth finish. To attach them I used Elmer’s wood glue.
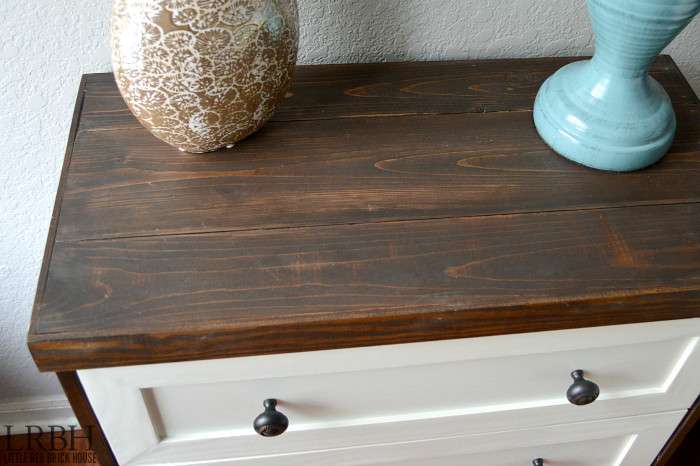
Then I created an upside down tray for the top. I used a 1×6 pine board flanked by two 1×4 wood boards on each side. I nailed them straight to the existing dresser top with a finish nail gun. Then, I finished out the sides of the tray top with some more wood lattice, nailing it in, as well. I stained it using Rustoleum Dark Walnut.
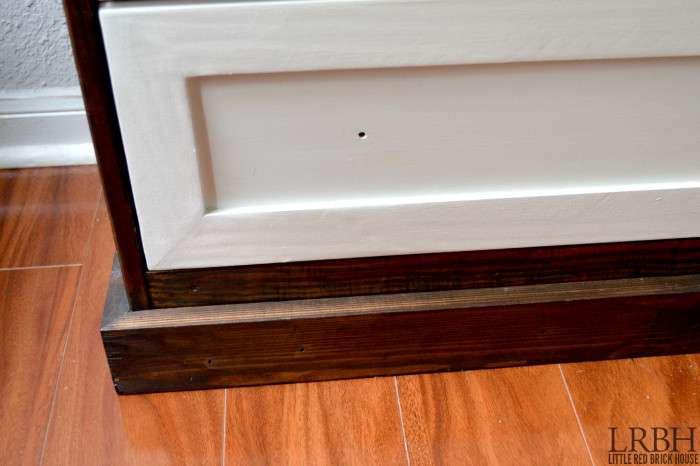
I nailed in a few 1×3 wood boards to trim out the bottom of the dresser. These were also mitered at the corners. You could use some decorative baseboard for a fancier touch. I’m a simple kinda gal, though, so I like to stick with the clean lines of the plain boards.
The drawer faces were taped off with painter’s tape and painted with Sherwin Williams Alabaster.
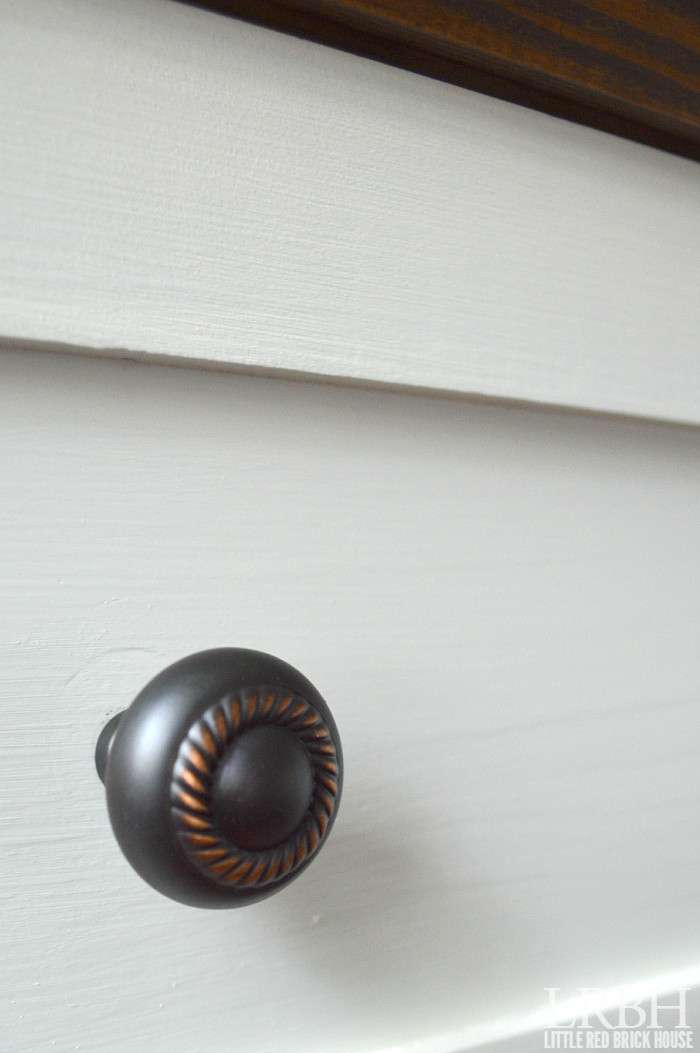
The final touch was the addition of drawer hardware. I bought the knobs from Lowe’s. They are the Brainerd 1-1/4 inch Bronze with Copper Highlights Round Cabinet Knobs. I like how they tie in the dark stain with the white paint. And I am absolutely smitten with copper, so it’s a nice little touch, as well.
And here is the finished product!
I am loving the added storage as well as having a place to set my phone at night. It’s also nice to have somewhere for a lamp to sit. Now I can snuggle in bed and read or (who am I kidding?) surf on Pinterest before it’s lights out without having the harsh overhead light on.
Have you tackled the IKEA Rast yet? If so, I’d love to see it!
*This post was originally published at Domestically Speaking on January 14, 2015.
Linking up at Remodelaholic.com.


Just wondering if you had to adjust your drawer slides for the extra 1/4″ of trim you added to the drawer fronts? Or were you able to use the pre installed guides?
Thank you!
Hi, Jamiey! I didn’t have to adjust the drawers slides at all. Everything operates pretty much the same as it did before altering the dresser. Let me know if you have any more questions!
This turned out beautiful, Sarah! And I love your hardware selection. I’d like to invite you to link up with Friday’s Furniture Fix! Doors open every Thursday night at 9PM EST and close on Monday’s at 11:59PM EST. Your work is just fabulous!
Thank you so much, Carrie! 🙂 I appreciate the invite, too!
I love the look of these, you did a fantastic job! Wondering if you used the 1 3/8″ lattice for these pieces?
Thank you very much, Jamiey! I don’t remember the exact measurements of the lattice I bought, but from measuring it just now it appears to be closer to 1 3/4″ lattice. I hope that helps!
Is there anyway I could do the top without a nailgun?
Hi Mallory! I’m sure you could nail the boards on with a hammer and nails. If you are into the rustic look, then it should be just fine. Or if you didn’t want to see the nails you could countersink them and fill in the holes with tinted wood putty. 🙂
You do such beautiful work! Love what you did with the IKEA Rast.
Thank you so much, Marie! You are so kind.
Gorgeous! Love the combination of the dark and the light.
Thanks, Cat!
Sarah, this looks lovely. Your finishing touches are really nice!
Thank you so much, Pam!
This is really nice. Clean lines, and I love the hardware!
Thank you, Mary!
This turned out really great Sarah, I love all of the trim work.
Thank you, Stacey! It’s crazy how much you can change the look of these little guys!
I would have never guessed it was from IKEA. I’m totally crushing on this color combo and these knobs. Gorgeous job! 🙂
Thank you so much, LZ! I love how customizable they are!
Wow! I love this hack….simple and elegant! It looks nothing like an Ikea piece now.
Thank you, Gilly! I love how versatile the Rast dressers are. You really can do just about anything with them. So much fun!
SO GOOD! Really looks like a higher end piece!
Thanks so much, Corinna! I looove hearing that! 🙂